Photography
Related: About this forumSo why not build your own mini studio for small subject matter?
Having a mini studio allows you to fully control the light on small objects. If you have a light source and a mirror you suddenly have two light sources! Reflectors add highlights and accents. I have three types of fill reflectors; foil, white and neutral gray. I also use colored reflectors to add interest and dimension. So being as we are house bound why not?
First buy the largest U-Haul box they have; 24x24x18. Assemble it and tape the bottom as securely as you can, you're going to need the rigidity.
[img] ?1[/img]
Cut one 24x18 side off entirely and cut one 24x24 side free from the box but leave attached.
[img] [/img]
Measure up 17 1/2 inches on the still attached side of the box and cut the excess off.
[img] ?3[/img]
Fold all sides over and tape securely to add rigidity to the table top studio. At this point I'd paint the whole thing flat black but that's not really necessary. Just makes the thing look nicer.
[img] ?1[/img]
Drape the background into the box and secure with clips/clothespins. My go-to is black velvet but I have others as well; sheets, towels and shower curtains.
[img] ?1[/img]
Now just butt it up next to a window, add subject matter and place reflectors as needed.
[img] ?2[/img]
This is the pectoral bone from a rather large Red Fish I found on the beach at Galveston. In post processing the support can be brushed out and any debris on the velvet can be cleaned up as well.
[img] ?1[/img]
Although I can hand hold up to 1/2 second easily with the dual IS I like to shoot off a tripod so I can add and move reflectors and GOBOs and see the effect on the view screen.
For storage just slice down the connecting side of the back/side of the box and fold over on itself. You'll have to secure those two sides with tape next time you use the studio.
[img] ?1[/img]
edit to add:
Don't forget that the camera doesn't know up from down, left from right. That means to change the direction of light just mount your subject matter in a different orientation.
 = new reply since forum marked as read
Highlight:
NoneDon't highlight anything
5 newestHighlight 5 most recent replies
= new reply since forum marked as read
Highlight:
NoneDon't highlight anything
5 newestHighlight 5 most recent replies

SheltieLover
(57,073 posts)Bernardo de La Paz
(49,001 posts)One great thing about the tripod is that you can reduce the f/stop (aperture) to get greater depth of field. Small apertures (big f/number) mean long exposures.
Edward Weston famously made a still life of a pepper that took a day and a half to expose. But you can probably get great results with around 30 seconds of exposure (and appropriate f/stop, but crank down the f/stop first and set the shutter speed after).
Another great thing about tripods is you can also lower the sensitivity of the sensor (ISO speed) to get less noise in the image.
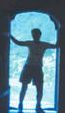
flamin lib
(14,559 posts)looked kinda like this:
[img] ?1[/img]
Talitha
(6,584 posts)So simple, yet so effective. 
Callalily
(14,889 posts)What a great project to do. I like the idea that it's "ready to go" when our creative juices start flowing! 